

In design jobs, there are often designers and developers who work together to make an app. The designers create an app mockup to show the developers what they want the app to look like, and then the developers build and code it into creation. A mockup is a fake version of an app that can help people understand how it would look and work if it existed. To create an app mockup, you don’t need to know how to code any of the app screens—you just need to be able to design what they might look like. This is known as “front-end” UI design, and it is a great way for designers to show developers how they might want an app to look. Adobe XD is an easy-to-use tool that can help a designer create this mockup. It not only allows for designers to create screens of the app, but also has functions to connect certain screens so that clicking on buttons can actually bring a user from screen to screen. This creates a very realistic portrayal of how an app will truly work, and it’s easier than you might think! This tutorial will serve as a brief introduction to Adobe XD, but you can find a full list of tutorials here. How to Make an App Mockup in Adobe XD
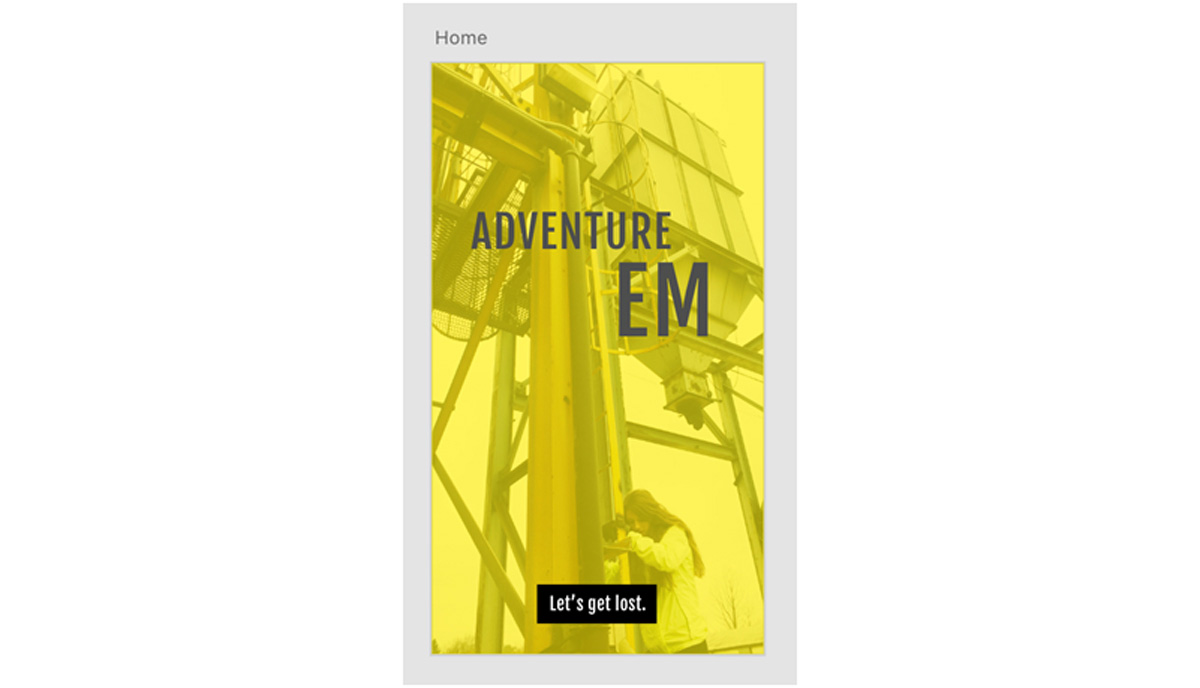
- Make a landing screen.
If you’ve never used Adobe XD, it might be helpful to start by making something simple just to get familiar with the tools. (If you’re skilled with other Adobe software, you might find it easy to catch on!)

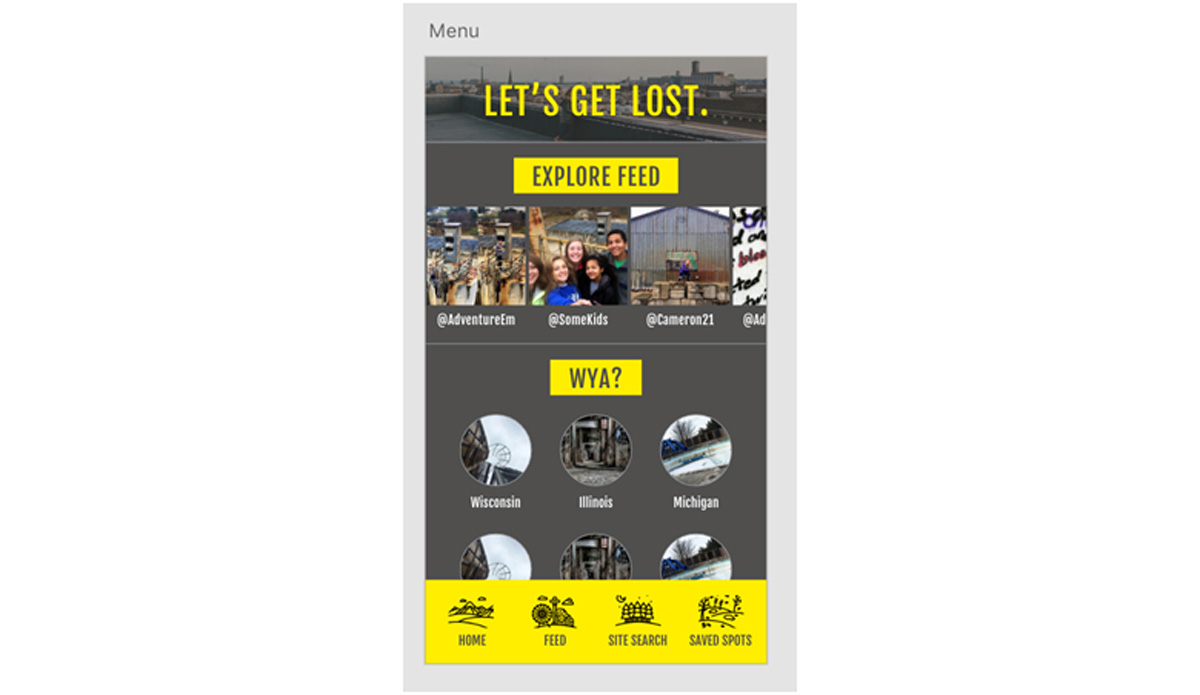
- Make a home/menu/settings screen.
Once you feel comfortable adding photos and text, get to work designing the other screens for your app. Common screen ideas include a menu screen, home screen, settings screen, feeds, etc. You can change the name of each artboard to reflect its purpose, just so things stay organized. This will help with linking the screens later.
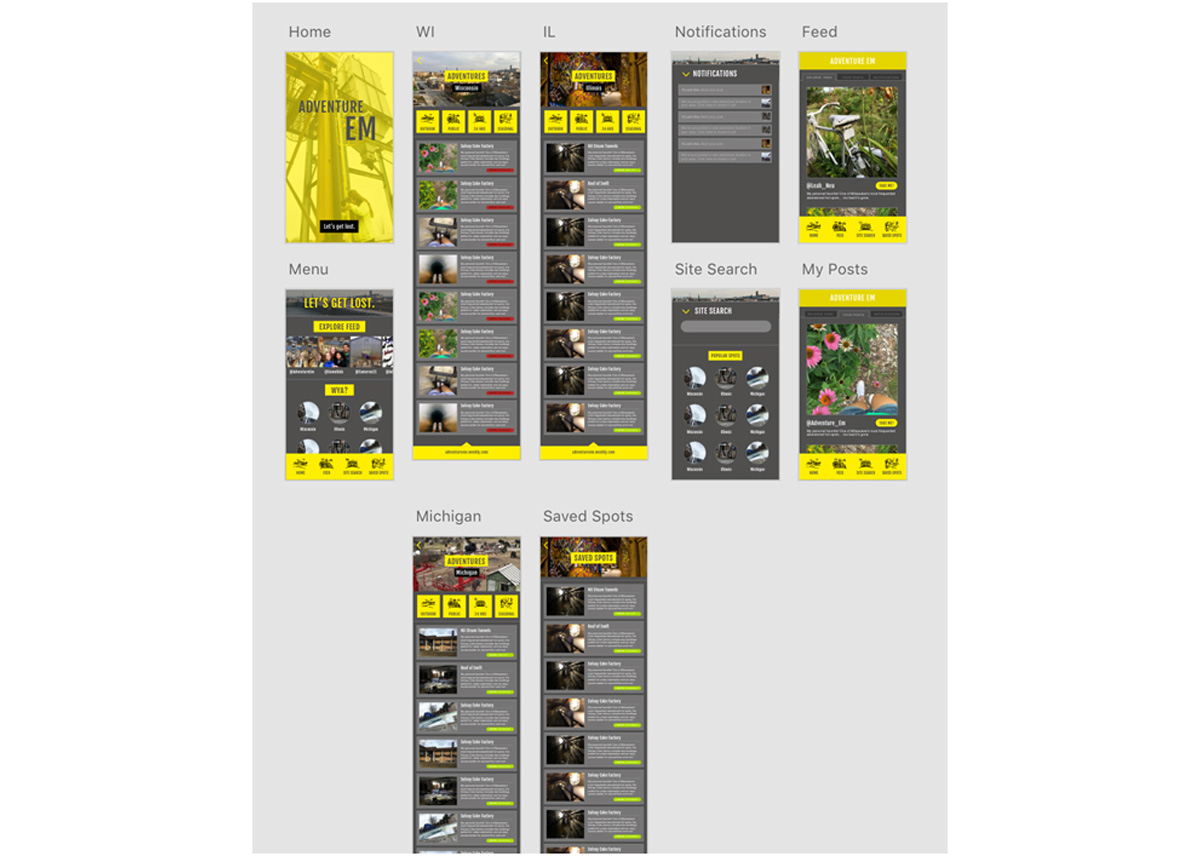 Once you have created all of your screens, the hard part is over!
 - Connect the screens.
Switch from the “design” window to the “prototype” window. In this view, you can click on any element and link it to another screen, which will move a user to that screen when they select the element. The interface on XD is easy to use and will guide you through the process of linking screens, asking which button leads where and what sort of transition you would like to take place between screens.
If you have text on top of a rectangle that you would like to serve as a button, group those elements by pressing command + G (ctrl + G on a PC) or going to Object > Group. That way, it will act as one object.
The screen with a tiny blue house next to it will be your homepage, or the screen that shows up when a person first starts the preview. If you want to change which screen appears first, click on a different screen and select the grayed-out house icon to make that the homescreen.
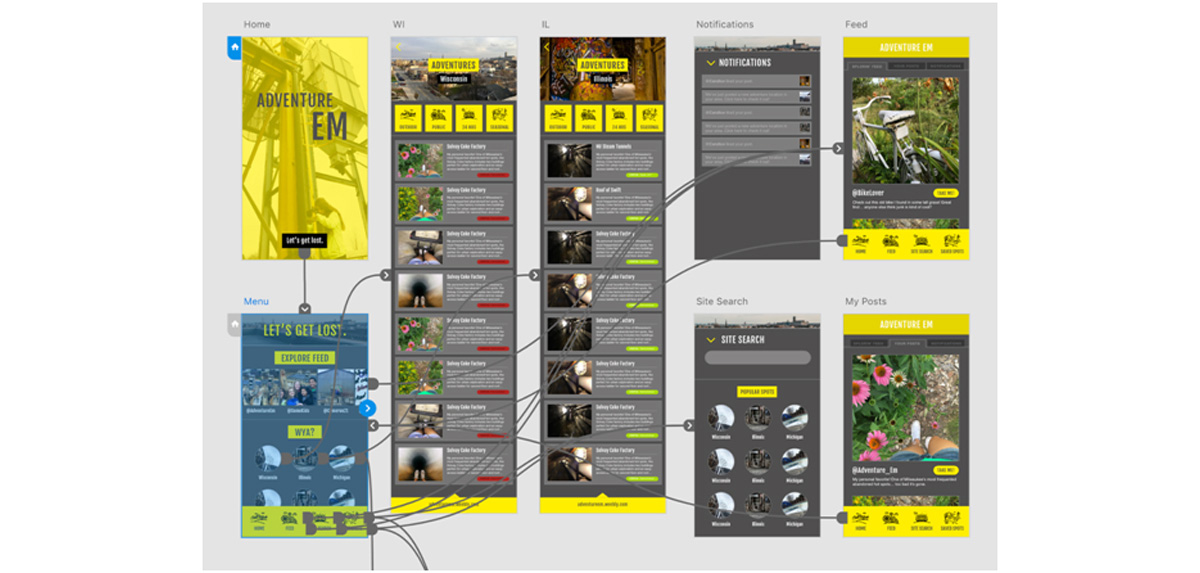 Seeing all of the various paths your buttons lead can be complex-looking, but once you start previewing the app, you’ll notice it is quite simple!
If you enjoyed learning how to make an app mockup, you might enjoy a career in UI (user interface) design. Adobe XD is a powerful tool for prototyping an app, but you can use it to make website mockups, too! See a full list of tutorials here. Are you a current student? See how you can save over 60%.