
Designing an iOS 10 sticker pack is a fun project that doesn’t take much time, and stickers can be a great way to promote your work and even generate some income. Can’t code? Don't worry about it. There are endless ways to get creative with digital stickers that people can use to add life to their iMessage interactions. So just find an idea you're excited about, and we’ll help you with what we figured out along the way!
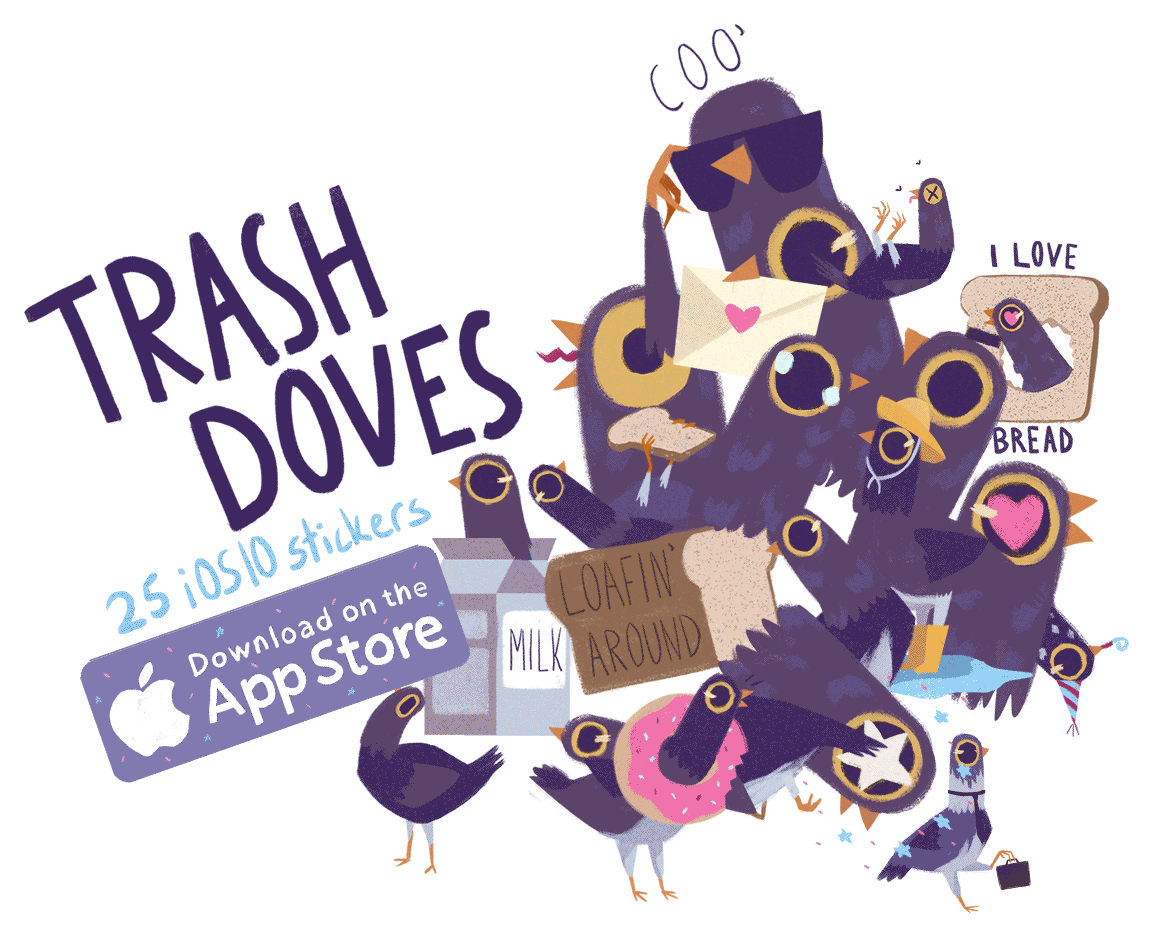
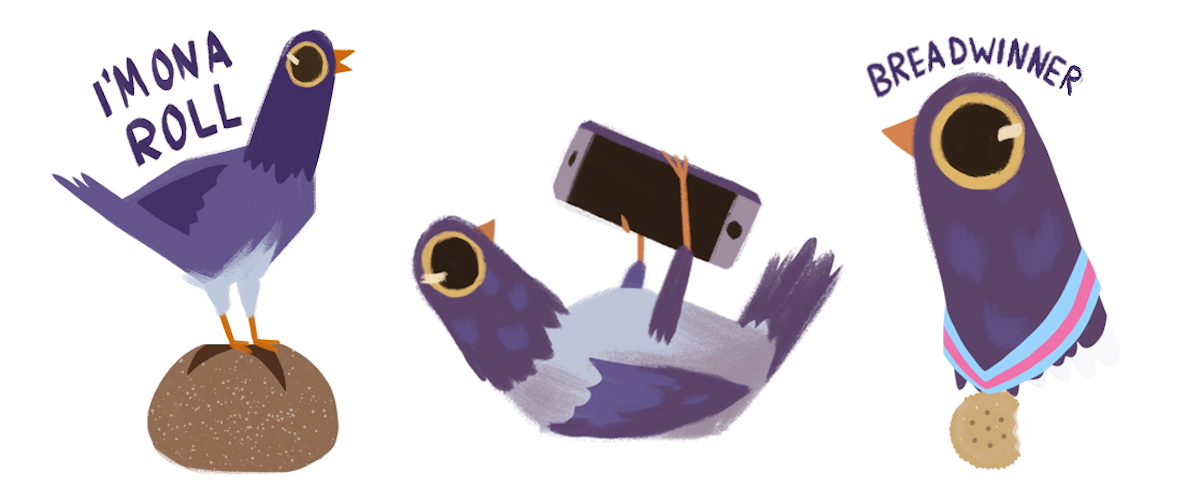
Syd Weiler’s Trash Doves sticker pack includes static and animated stickers—the updated pack has 37 stickers, which you can get for $1.99 via iTunes.
STEP 1: START SKETCHING
Sticker packs are created using a set of image files in PNG, JPEG, or GIF format. They can also be animated images in APNG or GIF format.
Xcode accepts stickers in three sizes:
- Small: 100 x 100 points @3x (300 x 300 pixels)
- Medium: 136 x 136 points @3x (408 x 408 pixels)
- Large: 206 x 206 points @3x (618 x 618 pixels)
We worked much larger than these sizes (so we could use the drawings for other purposes in the future) and then downsized the art as needed. You can always shrink work, but if you’re working in raster, you can't make it bigger!
Shauna Panczyszyn’s Hipster Jack sticker pack is available for $1.99 via iTunes.
Work out your basic set of designs with an eye toward range, variety, and appeal. Keep the relatively small image size in mind—intricate details will be hard to see on smaller devices. When you’re drawing, zoom out frequently to make sure that important details don’t disappear.
You’ll be making your stickers in Xcode, the Apple developer environment (anyone with an Apple ID can download Xcode for free). Stickers can be square, but you can also choose to make “cutout” stickers that overlay messages and photos.
STEP 2: SET UP A DEVELOPER ACCOUNT
Once you’ve committed to making your sticker pack, you’ll need an Apple developer account. In our experience, the approval process can take anywhere from a few hours to a few days, so apply as soon as you’re happy with your basic idea—that way, you don’t have to wait when you’ve finished working on your stickers.
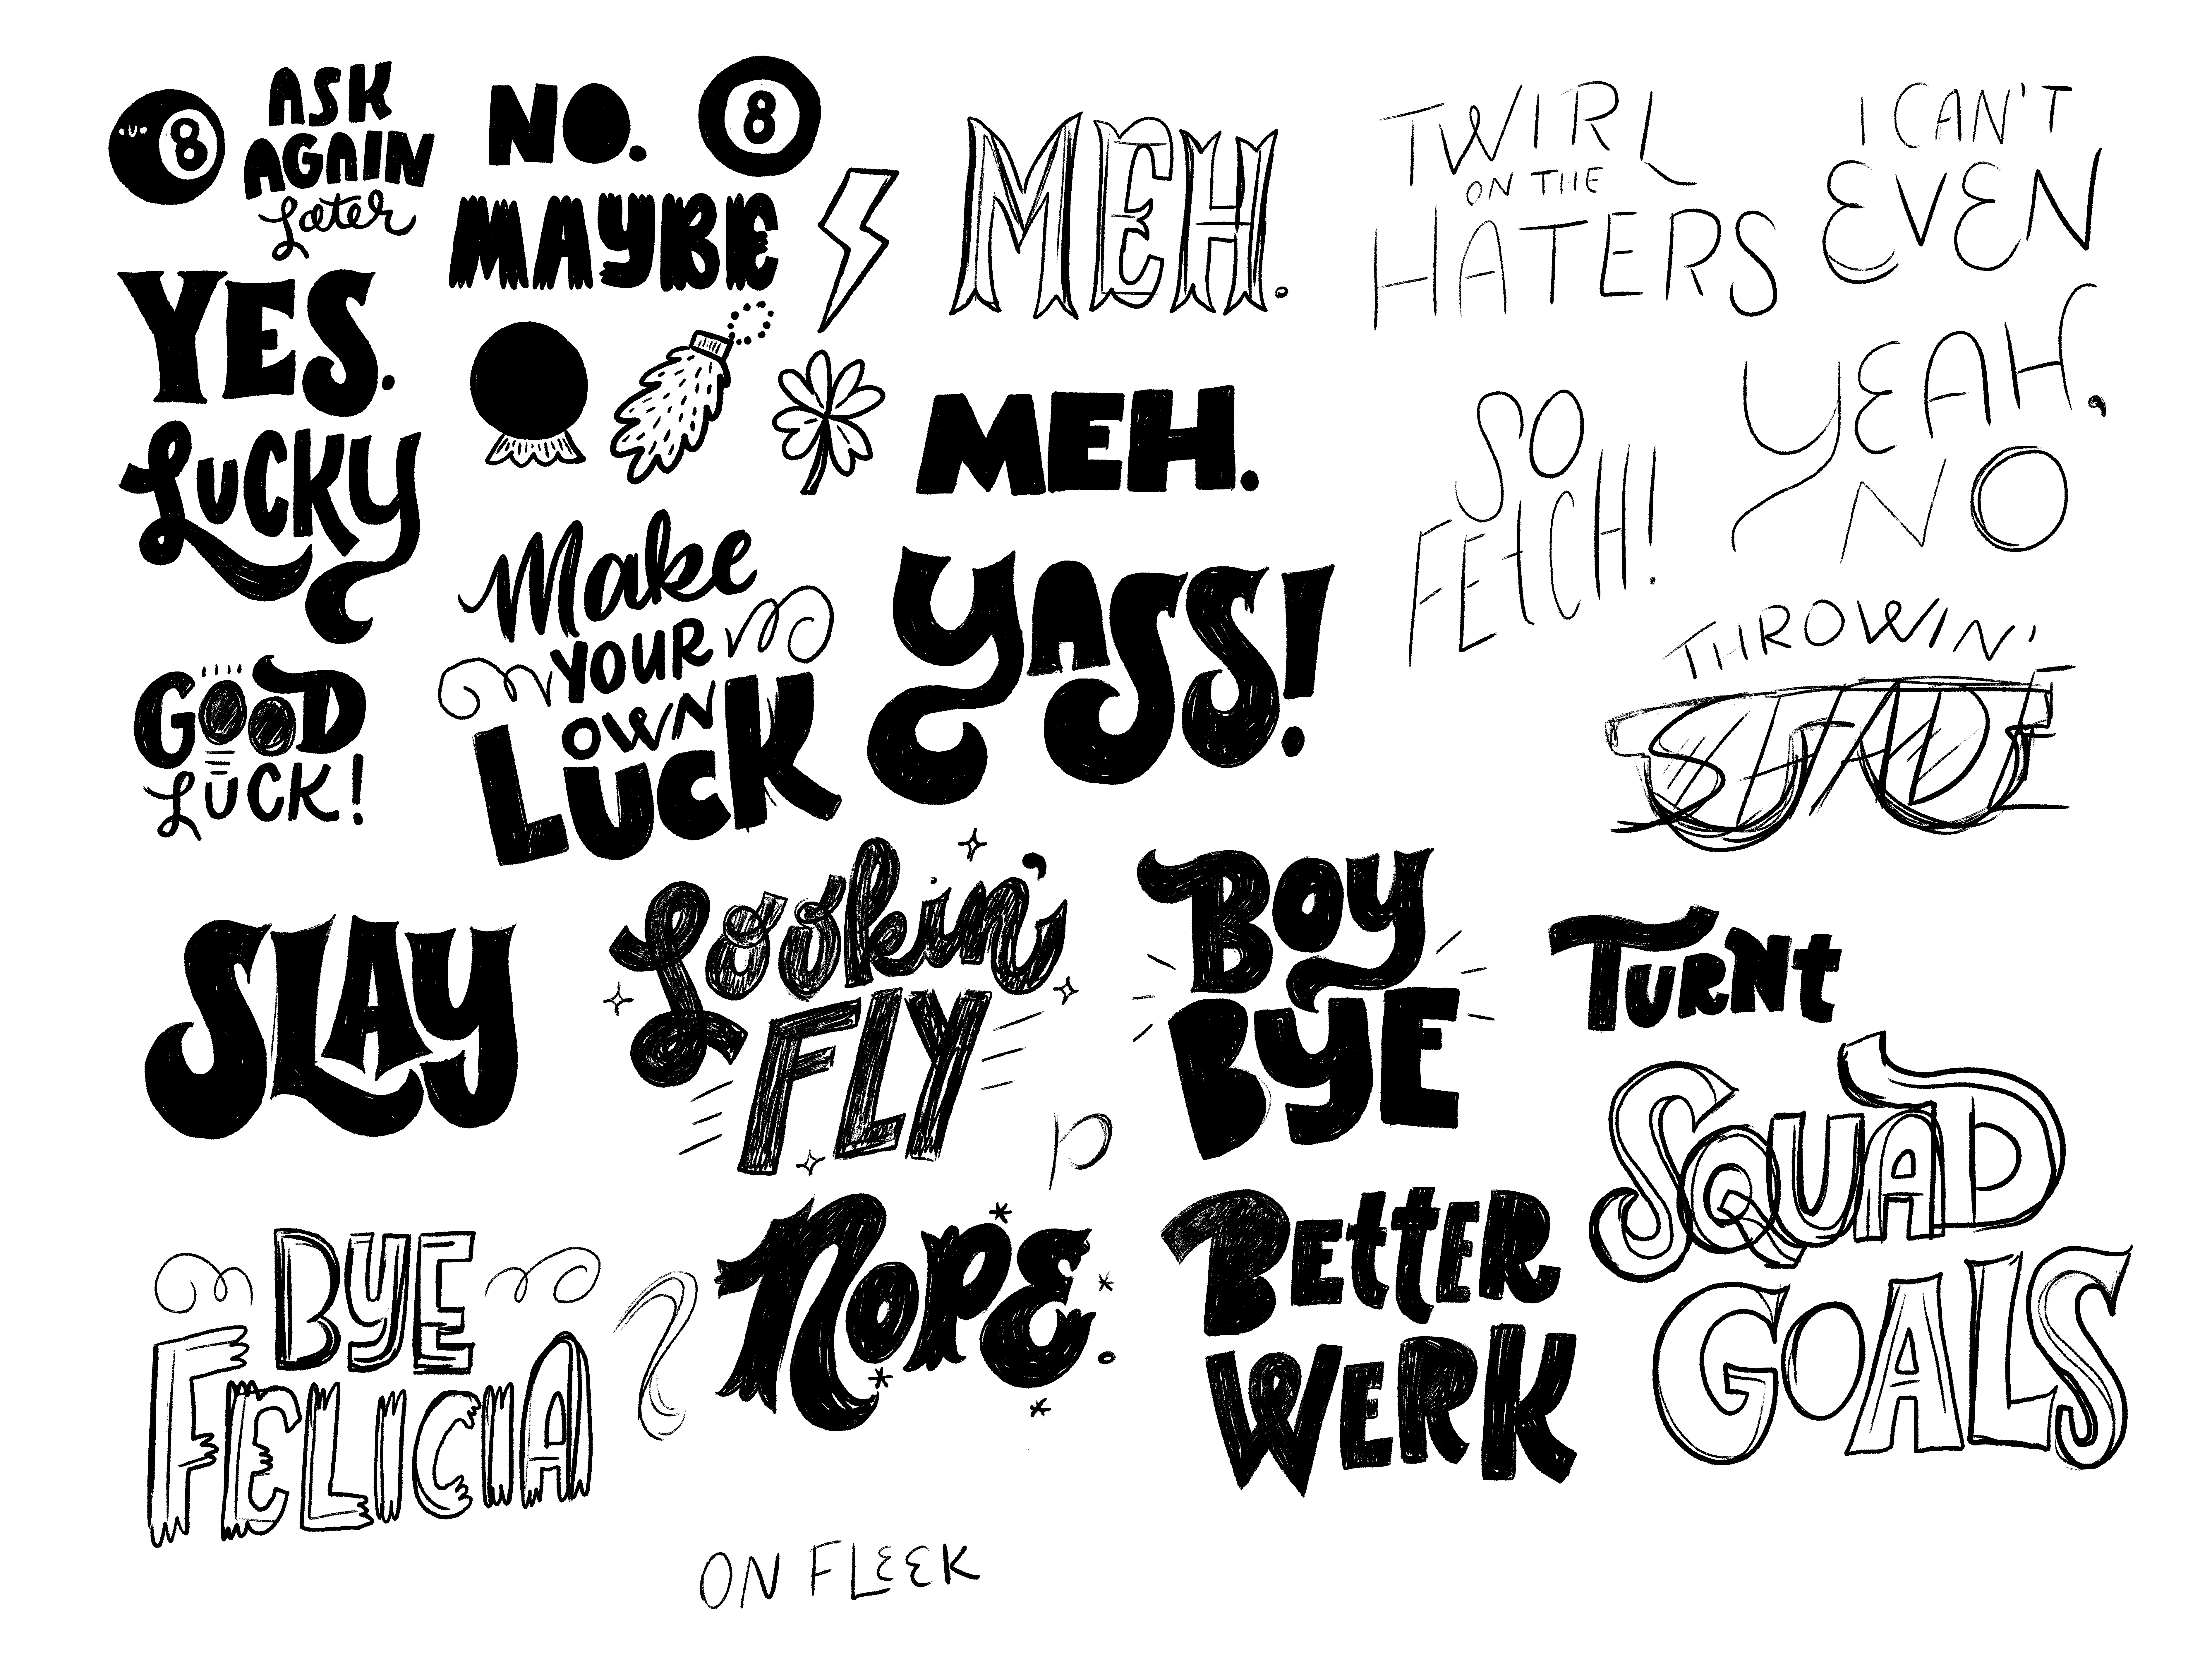
If your stickers include lettering, keep an eye on legibility. Make sure that your lettering and your words can scale smaller and larger while retaining readability and clarity. Remember that you’re working with a very limited space, and you don’t want to compromise your design.
Visit Apple’s developer enrollment page and fill it out. A developer membership costs $99 per year (ideally, you’ll earn this back fairly quickly), and your account will automatically renew each year, unless you specify otherwise. When the membership has been processed (again, this may take a few days), you’ll be informed by email.
When you get your approval email, you can then sign into iTunes Connect, where you need to set up information that will allow you to earn revenue. Follow Apple’s instructions carefully—especially when it comes to the Agreements, Tax, and Banking sections.

You can import GIF files into Xcode—the file-size limit is 500k, so keep your work simple! Syd’s animations were two seconds long, at 15 frames per second, with simple color and animation. GIF files support transparency, but their edges aren’t as clean as those of, say, a PNG file. Make sure the edges of your animated drawings are sharp, to avoid a white pixel halo around your sticker!
STEP 3: SETTING UP XCODE
After you’ve finished your drawings and cropped them properly (and removed the white background if you want them to have transparency), save them in a supported format. Save each sticker as its own image file.
Now it’s time to download Xcode if you haven’t already. Go ahead—we’ll wait.
Open Xcode and select Create A New Xcode Project. Then select Sticker Pack Application from the dropdown menu that appears.
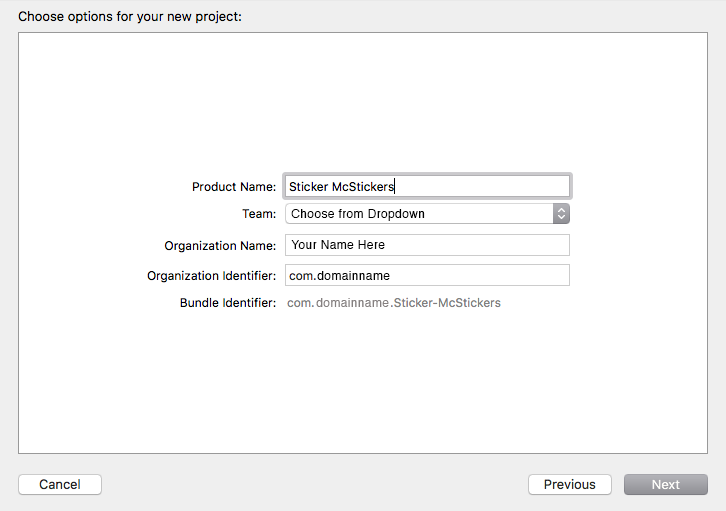
In the screen that appears (above), give your product a name. Choose your team from the dropdown menu (this will be your account if you are creating this on your own). Enter your name or your company’s name as the organization name. Xcode will automatically populate the Bundle Identifier field. Note this Identifier and save it—you will need to copy it exactly when you set up your App ID.
Click on Next.
STEP 4: IMPORTING YOUR STICKERS AND SETTING UP YOUR APP ID
You will see a menu on the far left; choose your product name from that menu, and then you will see a folder named Project. Click on that folder to open a workspace, and drag your image files into it. This is where you can organize the stickers as you want them to display.
You will need to create various app icon sizes for your pack. Xcode provides a template for that.
However, this template may have some errors. As of September 2016, there was some incorrect labeling in the sizing. So we have made this very easy for you by making PSD templates with the sizes that Xcode requires, for both the iPhone and the iPad. Download them here. Then you can click and drag icons into Xcode to set them up as necessary.
Setting up your App ID can be a bit confusing, but stick with us and we’ll get you through it!
Follow these steps:
1. Open iTunes Connect.
2. Choose My Apps.
3. Click on the plus-sign (+) button in the upper left corner.
4. Select New App.
5. Now look down to the Bundle ID portion and click on Developer Portal.
- Within Identifiers, choose App IDs.
- Click on the plus-sign (+) icon in the upper right corner.
- Add the name of your stickers in the App ID Description field.
- Choose Explicit App ID.
- The Bundle Identifier is what will connect Xcode to your sticker pack and allow for a seamless upload. This needs to match the Bundle Identifier you copied and saved in Step 3.
- Click on Continue and then on Register.
6. Now go back to the New App dialog box. Select iOS and English (if that’s what you want your app to be in).
7. From the Bundle ID menu, choose your Bundle ID (the one you just entered).
8. The SKU field is simply for your organization, so it can be whatever you want.
9. Click on Create.
STEP 5: MAKING SCREENSHOTS AND TESTING
Use the Simulator feature to create testing environments: Choose your device type from the dropdown list in the toolbar; then select Product > Run. This will open a window that simulates an iMessage environment. You can make sure your stickers are looking great there—don’t neglect to test the transparency of overlay stickers with chat bubbles and other stickers in the pack, especially for animated stickers!
You can use the Simulator feature to take screenshots of your stickers. (iTunes Connect will require these—and people will look at them to decide on a download!)
Set up your screenshot conversation and—this is important—set the simulator back to 100% before capturing screenshots!
When creating your screenshots, keep in mind that anyone can see these, so they need to be kid-friendly.
STEP 6: SUBMITTING TO THE STORE AND BUILDING YOUR APP PROFILE
Your pack is looking great, and you’re ready to submit it to the store! Great job, high five! At this point, you simply need to archive your final build to send it off. Choose Generic iOS Device from the Simulator dropdown menu. Go to Product > Archive and then validate your build. Run through the prompt. If no errors are found, choose Upload To App Store.
If your build archive fails and you get an error message saying there is no device associated, simply plug in your iOS device while Xcode is open. If you set your phone up in Xcode, you can download the stickers directly to your phone to test before they’re released.
Next, choose Apps from the iTunes Connect main menu. From the left column, choose + Version Or Platform, choose iOS, and then add your version number. Complete the profile prompts, filling out all the fields.
Here are a few tips:
- Keep your description fun and to the point. (And proofread everything! You can’t edit this information later.)
- Choose as many categories as you think relate to your pack, and add as many keywords as you can think of. Make it easier for people to find your pack with a store search.
- Add the rating you believe best fits your pack in terms of age and content. Guidelines can be found online if you have questionable content. The store will change this if needed (higher age ratings may affect your market and sales).
- Localization settings make your pack available for download or purchase to countries of your choosing. Customize settings, or make it available worldwide. Your official rating may also affect this availability.
- You can make your stickers available for free (and if you’re using copyrighted content, you probably have to), but if you’ve worked hard and made your own from scratch, pay yourself! We asked a dollar or more for our packs—consider the hours you put in, sticker count, and features such as animation when you’re settling on an amount.
Once everything looks great, submit the app to the store for review!
The review will likely take anywhere from a day to three days. All our packs took under 36 hours from submission to approval, but this may vary. When the app is listed as ready, you should see it in the iTunes store within a few hours (or as little as 15 minutes).
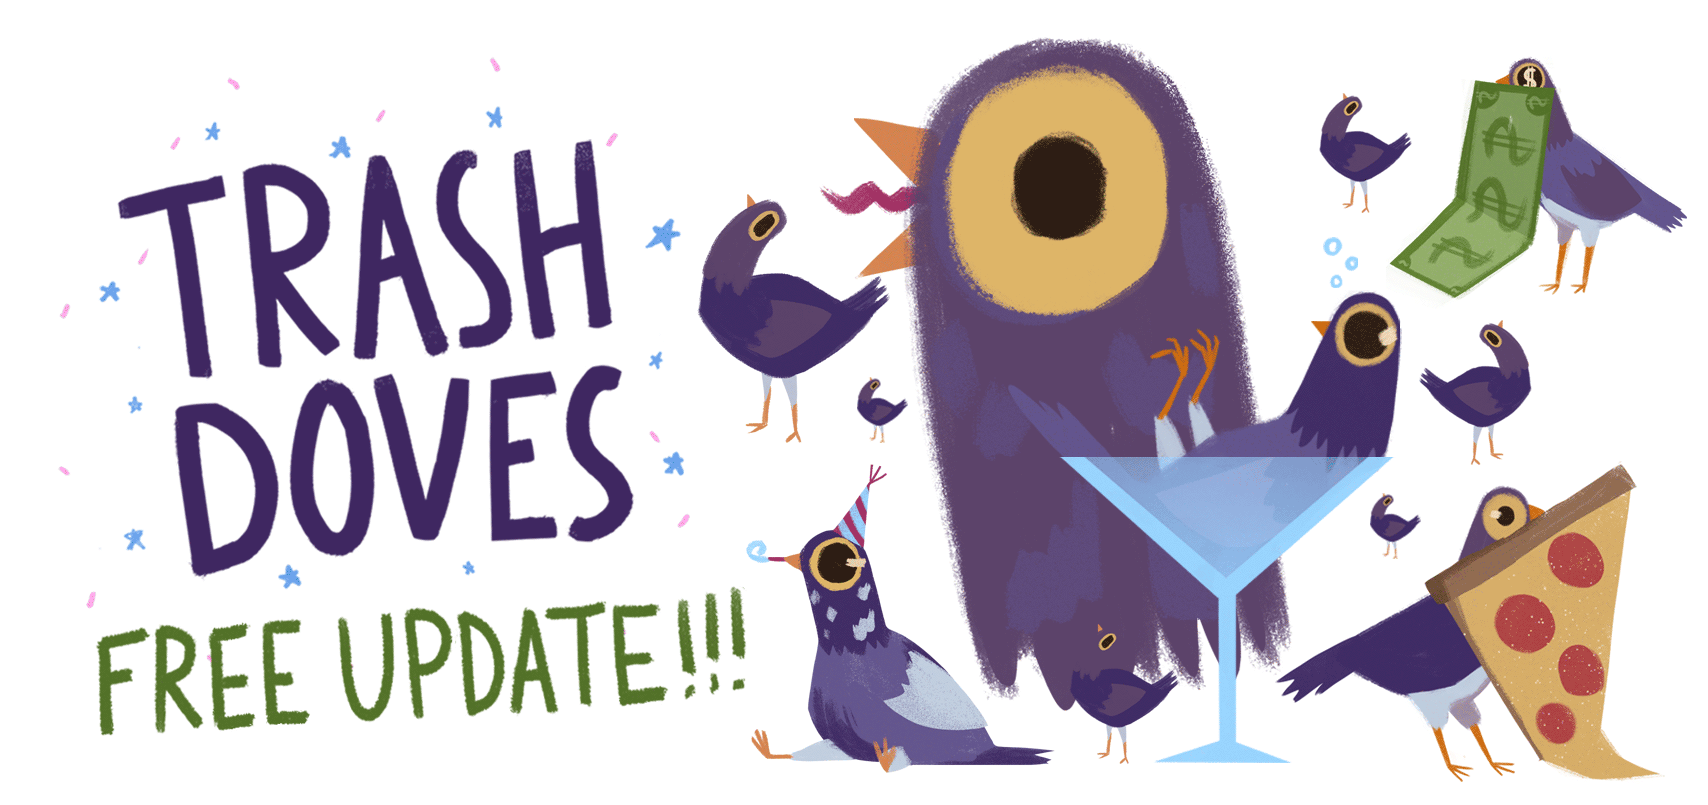
Syd released a free update to her Trash Doves sticker pack, with 12 new stickers (on top of the original 25). An update is a great way to give a sticker pack a “second wind.”
STEP 7: MARKETING AND UPDATING YOUR STICKERS
Pull out all the stops and make a great image or GIF to promote your pack, and share it on social media or wherever you can.
Adding new stickers to a pack is easy and a great way to encourage new downloads. Reopen your original Xcode project, and drop the new stickers into it. Order them as you want them to appear in the pack update.
Then change the version and build numbers in the General Info section. When you’re happy with your update, archive it to iTunes and submit it for review.
We hope this helped you get through the process of making a sticker pack—we can’t wait to see your stickers in a text message soon!
December 2, 2016
.jpg)