

Cinemagraphs are the perfect combination of film and photography. Add movement to an otherwise stagnant photo and spice up your portfolio or Instagram profile. If you’re unfamiliar with the term cinemagraph, think of a gif. A cinemagraph is similar to a gif — they’re both moving, looping images. But the similarities end there. Cinemagraphs have one moving part while the rest of the image is still. For example, take a video clip of coffee being poured. A cinemagraph of this clip might have just the stream of pouring coffee moving, flowing steadily and never stopping. Cool, right? For aspiring photographers or videographers, cinemagraphs are a great addition to a portfolio. Demonstrate your ability to think outside the box and present material in an unexpected way. Even if you’re only looking to add some flare to your Instagram profile, a cinemagraph will do the trick. Read on for a step-by-step process to creating a cinemagraph using Photoshop.
- Select a shot A stunning cinemagraph captures motion that is easily loopable, like coffee pouring, leaves blowing, or a fan spinning. An ideal shot will also have stability around the moving element. Be wary of shots with people in them — people look spooky if they aren’t blinking.
- Setting the clip
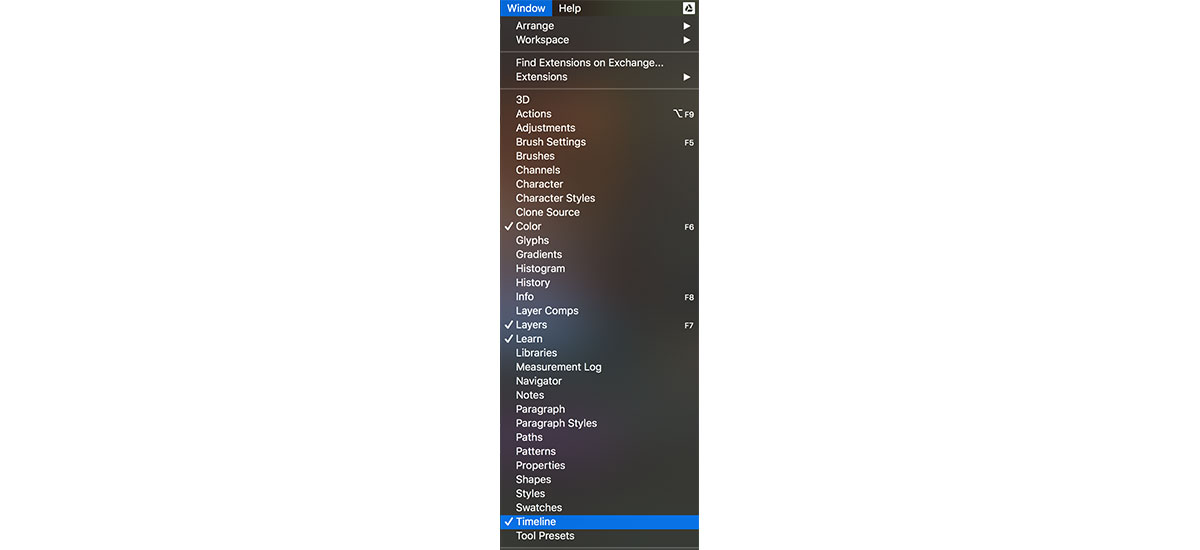
Once you’ve recorded your shot — an iPhone does the trick, but a camera set up on a tripod will look sharper — open the timeline by going to Window > Timeline.

- Looping frames
Select the gear icon in the timeline and make sure Loop Playback is selected. Then, copy the video by going to the Layers panel and dragging the video to the New Panel button next to the trash. Line the start of the original clip up with the end of the copy, then drag the start of the original back a little bit. Line both ends up.
With the red cursor at the start of the original clip, click the drop-down arrow to the left of the copied clip. Click Opacity. Then, drag the cursor about halfway through the original clip and click the diamond next to Opacity. In “Opacity” in the Layers panel, drag the slider down to zero. What you’re doing here is creating a keyframe.


- Creating stability
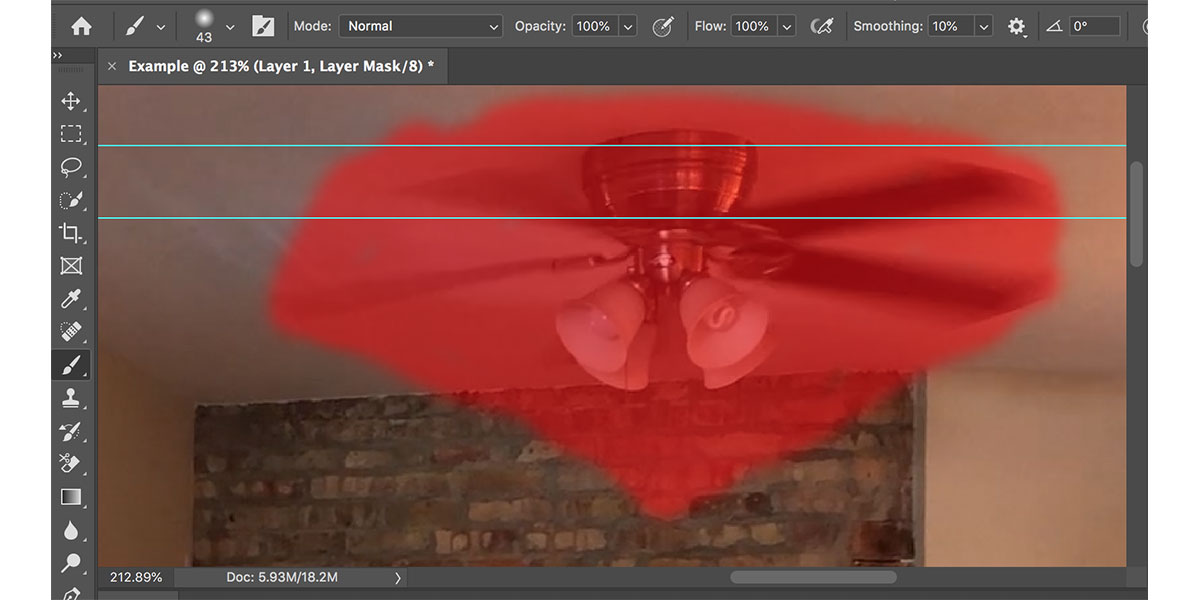
With the copy selected and cursor at the start of the clip, press Command + Option + Shift + “E” to duplicate the clip into another layer. This layer is a still image of the video clip. Then, with the layer selected in the Layers panel, click the Layer Mask button next to “fx.”

Check out how you can save up to 60% on Photoshop and the rest of Adobe Creative Cloud.