


Designing on a grid is an easy way to elevate any print design project, but it’s especially important for a yearbook. A grid is an invisible guide that helps designers fit content onto a page. It helps with alignment and spacing. When working with a document that multiple people will be working on, it’s crucial to develop design guidelines to ensure that everyone’s styles look cohesive in the final project. Using a grid can help every page to maintain some level of consistency—and often makes it easier and faster for a designer to create a page layout.
- Decide how many columns you would like.
Most magazines use a three-column grid while most newspapers use six. It’s up to you and your staff to determine how many columns you’d like to use! Look at a few of your favorite example books, magazines, and designs to see how many columns they appear to use. (Often, magazines will have certain elements breaking the grid, especially in front-of-the-book or back-of-the-book sections, but you can usually tell how many columns they use by looking at a feature page with mostly text.) Using up to twelve columns is considered normal, but keep in mind that having so many guidelines on an InDesign layout might be intimidating or chaotic for less-experienced designers.
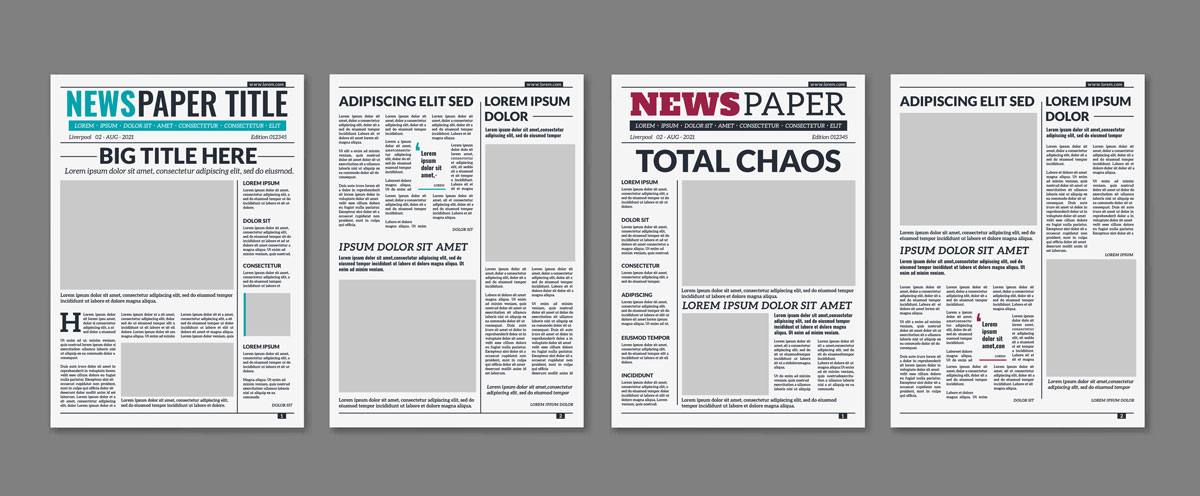 Each of these designs uses a 5-column grid, which you can see by the number of text columns. (The first design breaks the grid to create a three-column story on the left side of the page, using four grid columns.)
 - Go to Layout > Create Guides.
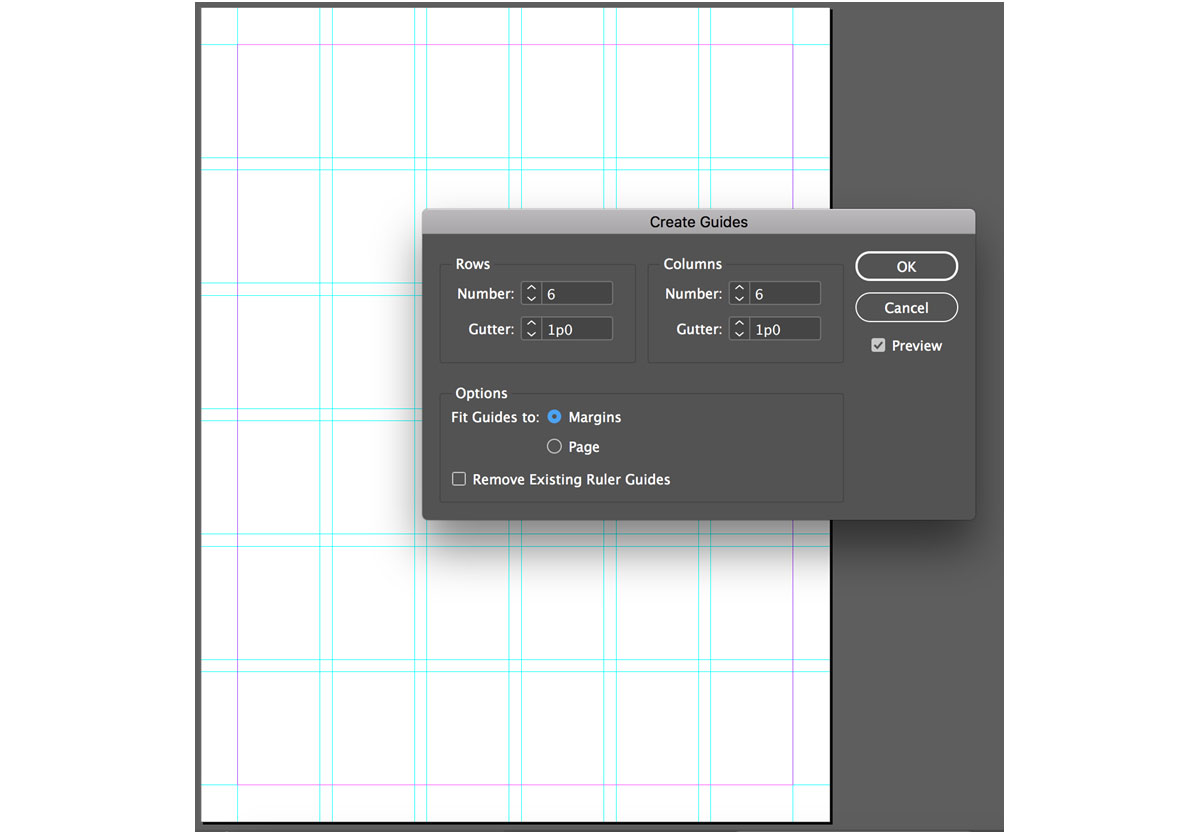
Make sure you have “preview” checked so that you can see what you are creating as you go. You’ll see the guides when you’re designing in InDesign, but when you print the pages, they won’t show up. (You can also hide them from your view, quickly, by pressing the “w” key on the keyboard to go into presentation mode.)
In the columns box, type the number of columns and rows you decided in step one. For this example, I went with six of each.
You might notice that the grid aligns itself to the entire page, which is not particularly helpful. Since you can’t design in the page margins, it’s better to have the entire grid fit just within that box, so select “fit to margins” in this window as well.
- Optional: Turn on “snap to guides”.
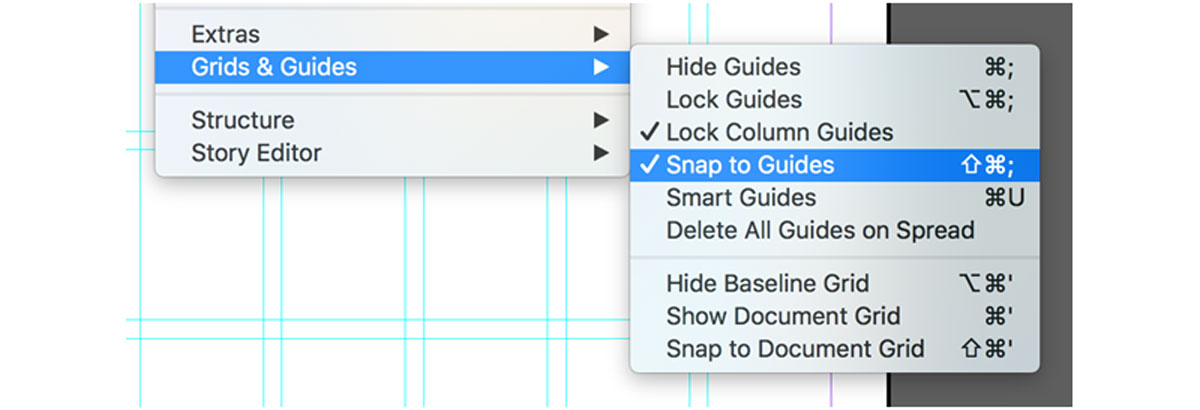
Once you have built your grid, it can be helpful for InDesign to align your text boxes, photos, and other objects to the guides by default. To turn on this setting, go to View > Grids & Guides and make sure that “Snap to Guides” is checked. You can always turn this off later if you’re breaking the grid for a certain layout or story, but you probably want it on by default!
In this menu, you may also notice the guides are locked in place. If you un-check this option, you will be able to manually manipulate the guides by dragging them with your mouse.
You can also hide the guides at any time by using this menu or pressing command+semicolon.
- Start designing your yearbook! Once your guides are set, they’ll be applied to every page in your document, whether it’s a magazine, newspaper, yearbook, or other print piece. Remember, you can hide them quickly by pressing the “w” key on the keyboard to go into presentation mode! Good luck and happy designing!
For more information about creating grids and guides in InDesign, discover baseline and document grids. Are you a current student? See how you can save up to 60%.